Custom Fields allow your facility to collect extra information from customers during account creation, event registration or even if they’re simply making a rental booking at the facility. This can include information such as allergies, preferences, skill level, agreements to terms, and more.
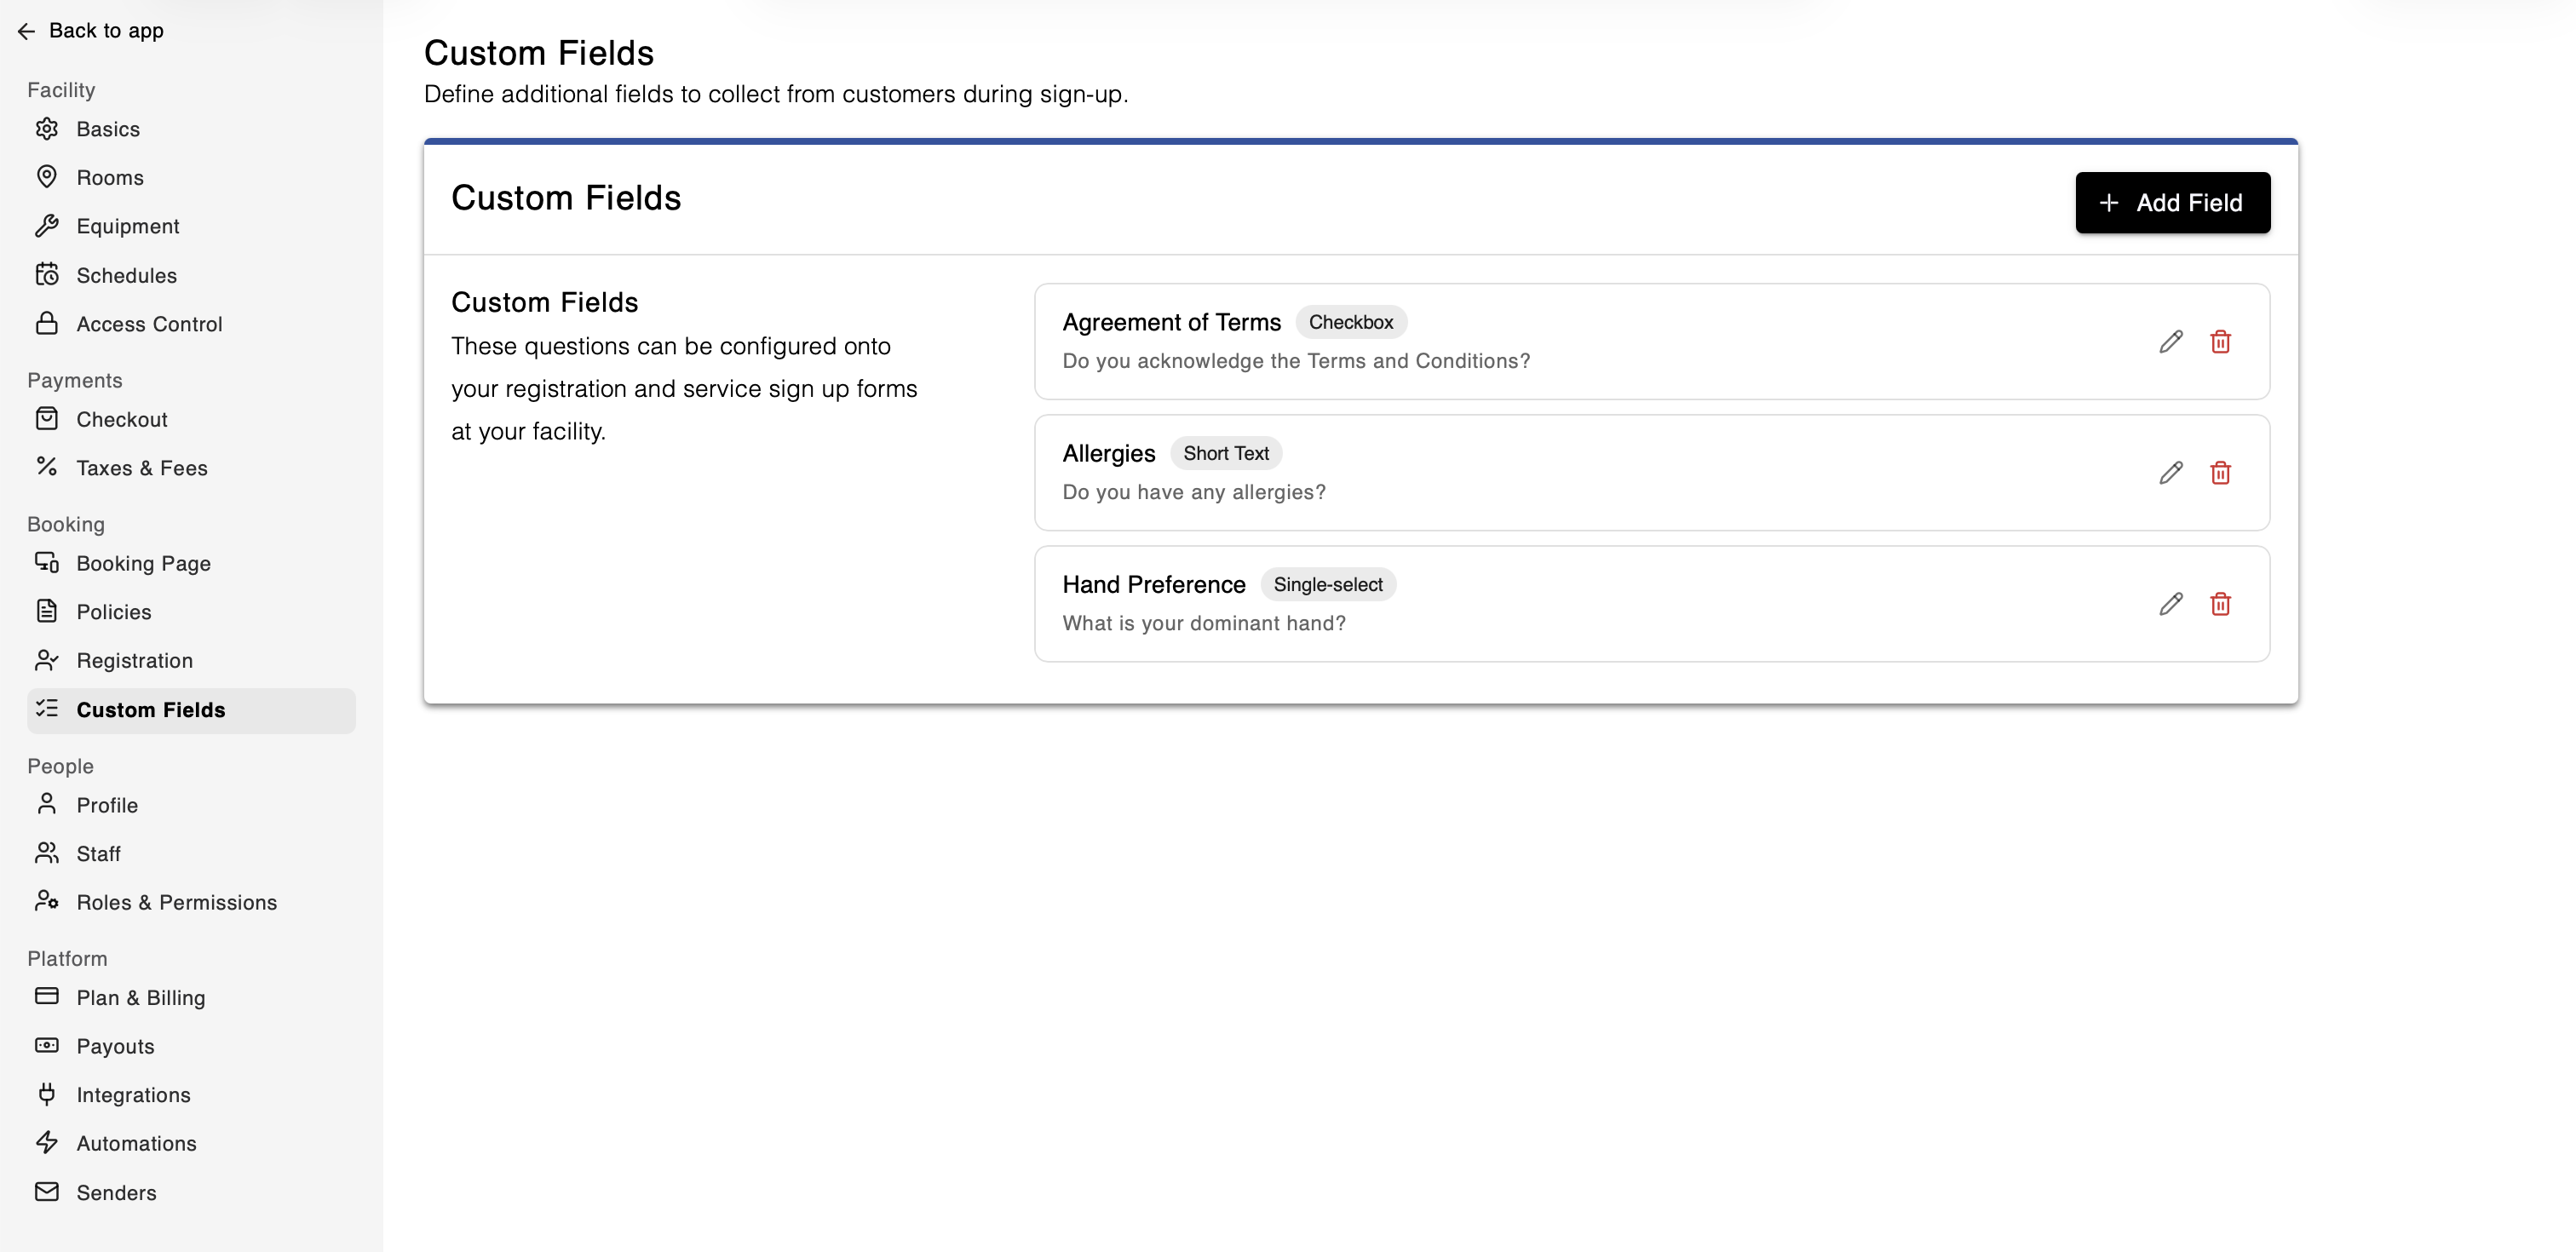
In your Admin dashboard, go to Settings > Custom Fields. From here, you can:
View existing custom fields
Add new fields
Edit fields
Delete fields
To create a new custom field:
Click + Add Field
Select a field type
Enter a label and question for your field
Save your changes
Text: A short written response. Useful for allergies or notes.
Number: Accepts numeric values only. Useful for jersey numbers or age
Single-select: A dropdown where one option can be selected. Useful for hand preference or skill level
Multi-select: Allows multiple selections. Useful for goals or interests
Date: A date picker. Useful for date of birth
Checkbox: A simple yes or no option. Useful for terms and conditions
Each custom field has two icons on the right:
The pencil icon lets you edit the field's label, question, or options
The trash icon permanently deletes the field. This cannot be undone.
Custom Fields can appear in:
The customer registration or account creation process
The booking process for service or event sign-ups
This allows you to collect information either during account creation or when customers register for specific services.
To add Custom Fields to your facility registration form:
In Admin, go to Settings > Registrations
For Additional Information, click on Add Custom Field
You can create a new Custom Field or select Add From Existing
You can mark whether the field is required to complete, or if left as off, it will be optional
You can also collect Custom Field information for specific services such as classes, lessons, rentals, camps, or events.
To configure this:
In Admin, go to Services
Select the relevant service type (Classes, Lessons, Rentals, Camps, etc.)
Open the specific, individual service
Expand Advanced Settings
Under Additional Checkout Details, add or select the Custom Fields you want to include
Click Save
If you've added Custom Fields to the customer account creation process, you can find the responses by:
Open the customer's profile in Admin
This will automatically open to the Profile section
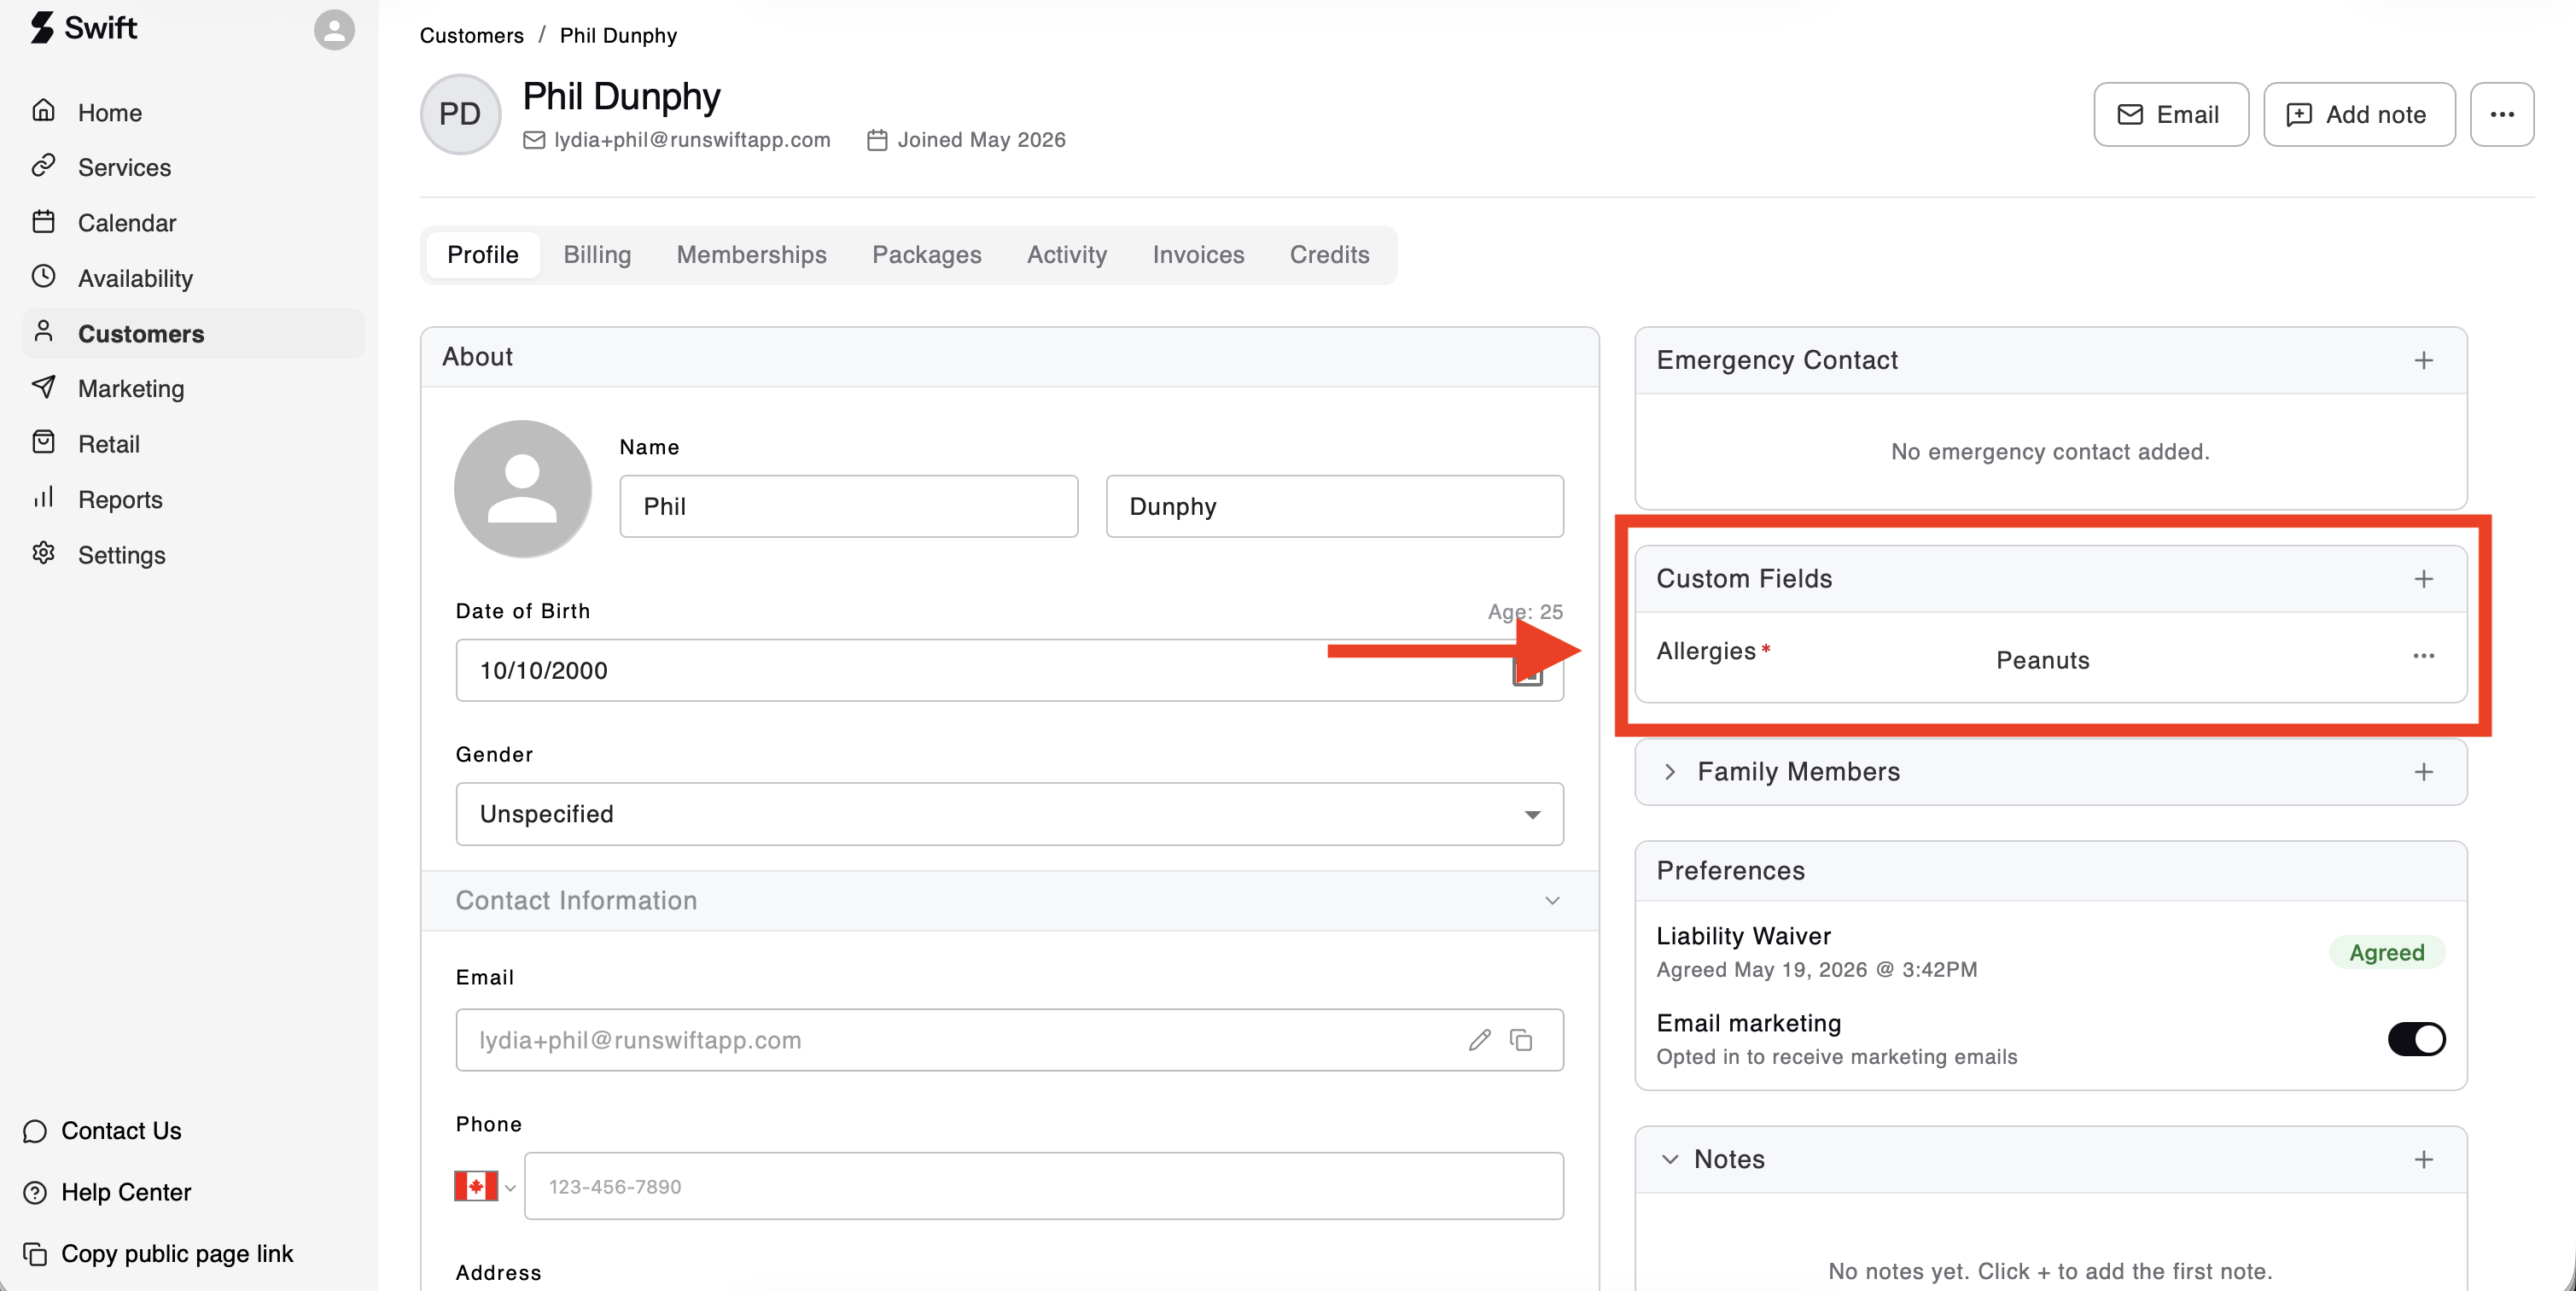
Under the Custom Fields section, review the submitted responses
Their submitted answers will appear there for staff to review and reference later. The facility is able to update the response directly from this view, and the customer can also update their response through their own Swift account too.
If a Custom Field was added to a service or event registration form, responses can be viewed from the Service Form page.
To view them:
In Admin, go to Services
Select the relevant service type (Classes, Lessons, Rentals, Camps, etc.)
Open the specific, individual service or event
Go to the Participants section
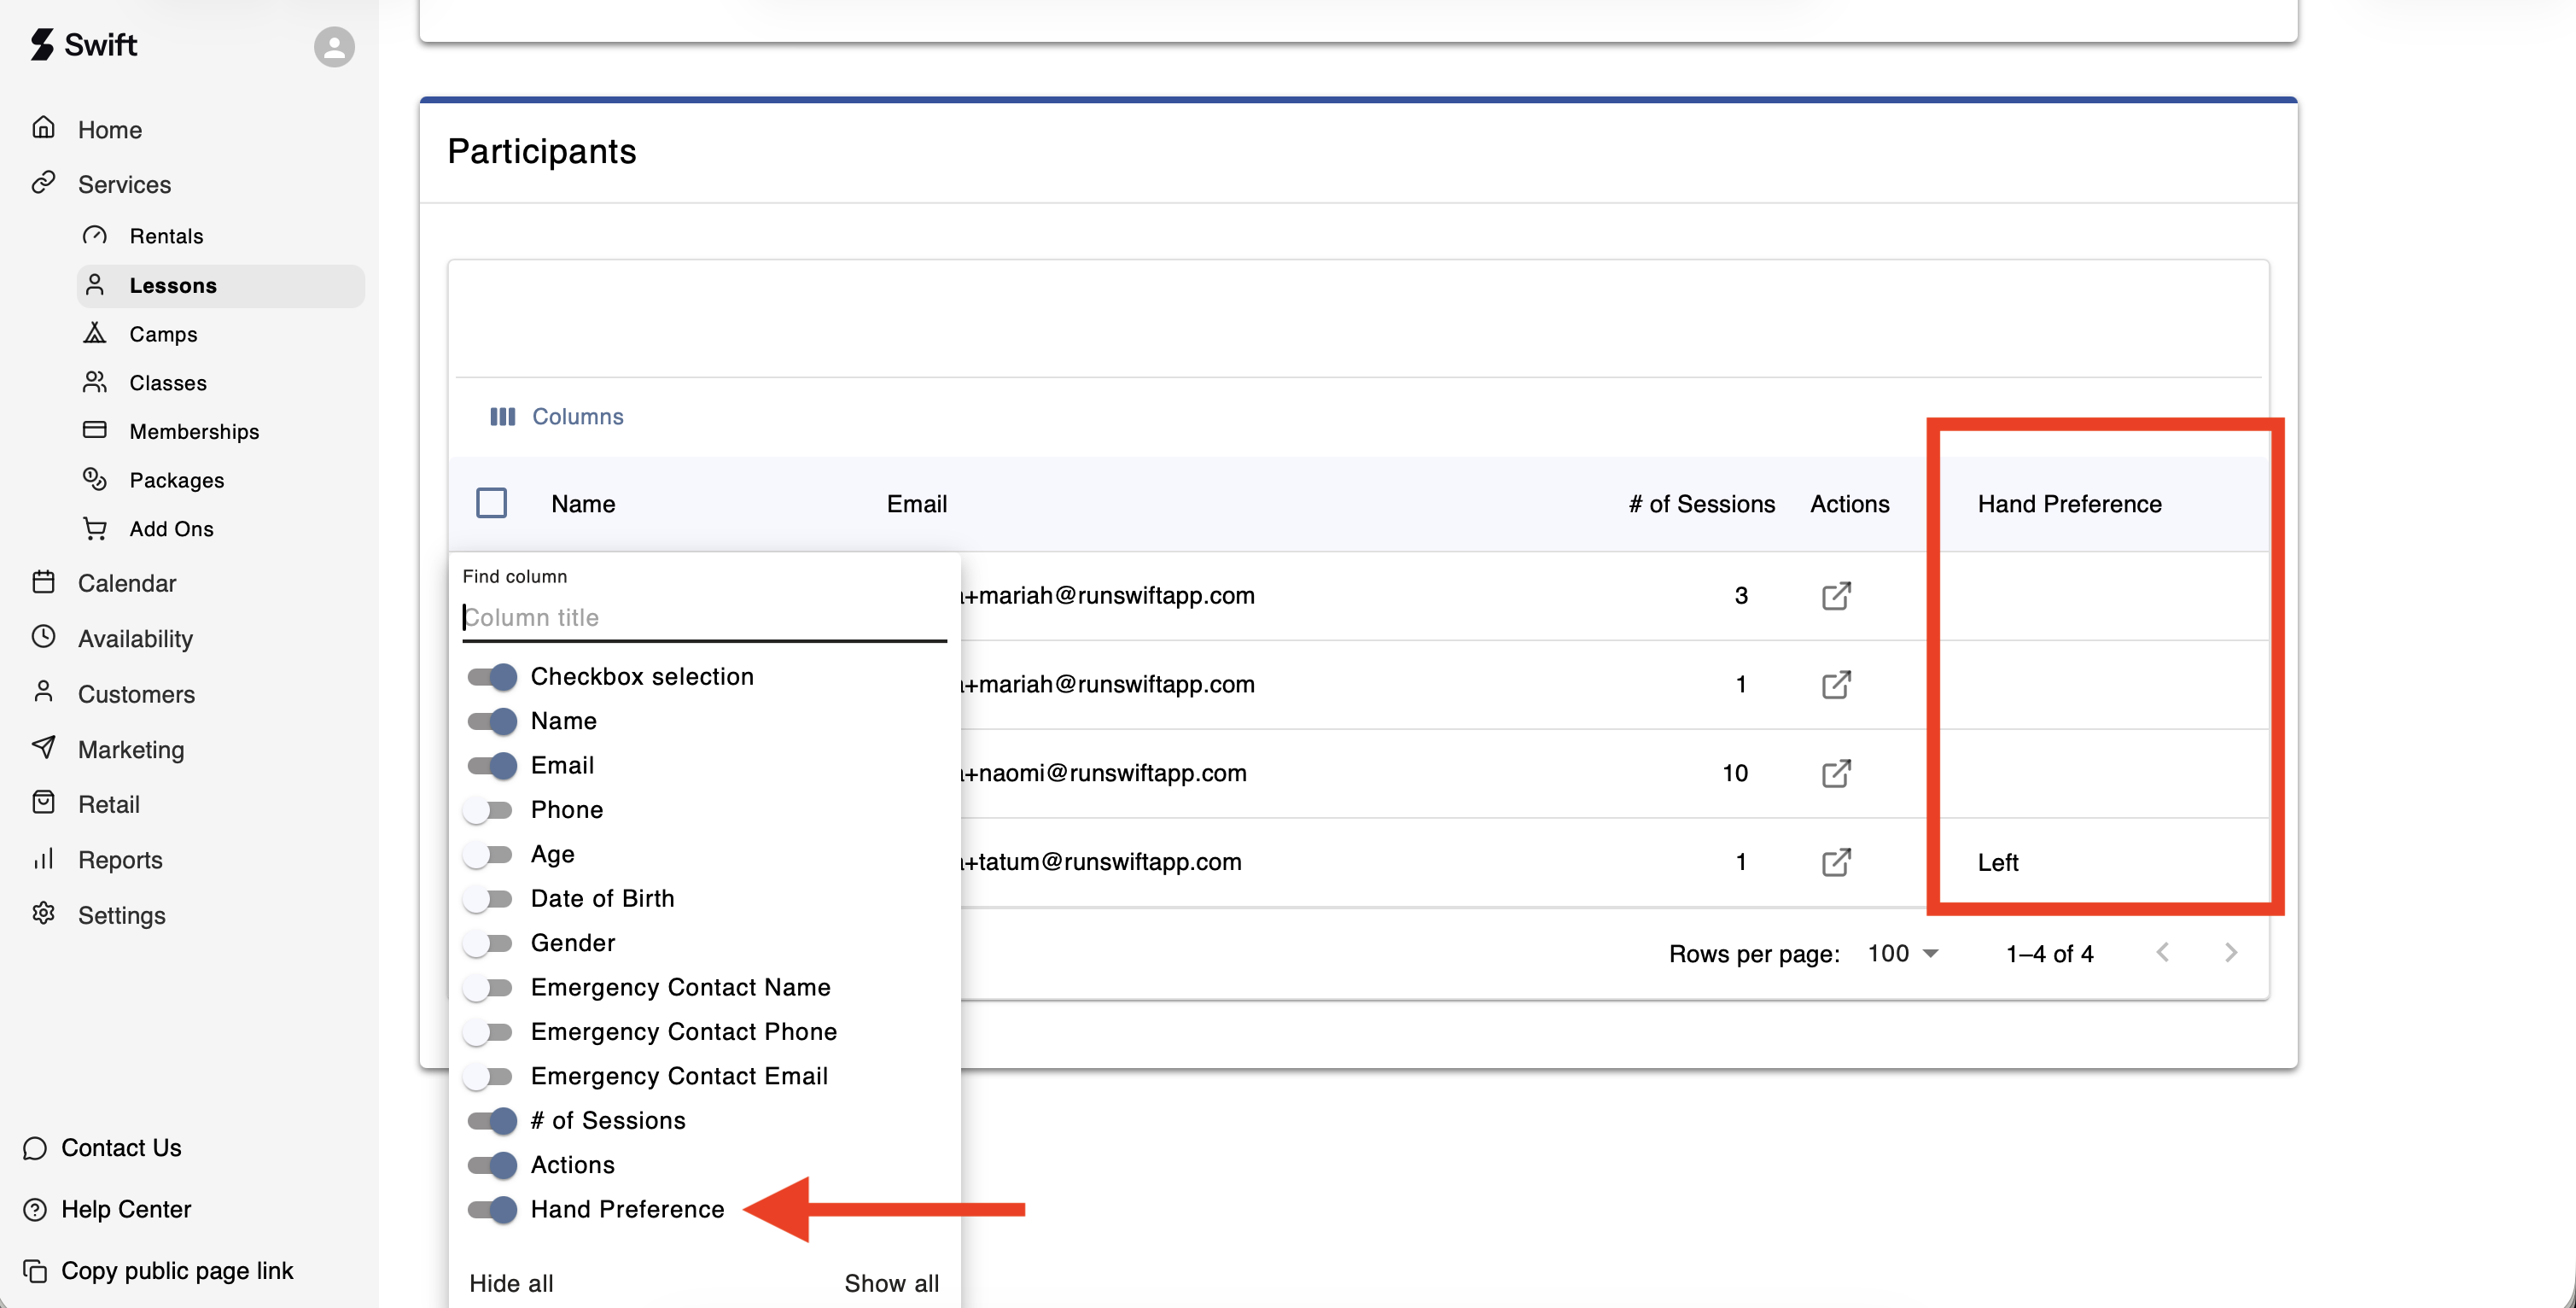
Select Columns, and toggle the relevant Custom Fields to ON
Review participant responses directly from within the table (slide across to see the additional columns).